As the heating season begins, we are seeking all possible ways to save energy, given the current circumstances. In households, the majority of energy consumption is used for heating. Heat escapes through walls, windows, doors, and roofs. However, significant heat loss can be reduced by properly insulating walls and other critical areas such as foundations, floors, and attics. Installing modern windows and doors can also help mitigate the effects of rising energy costs, making these investments highly beneficial.

Thermal Insulation – The Foundation of Effective Energy Savings

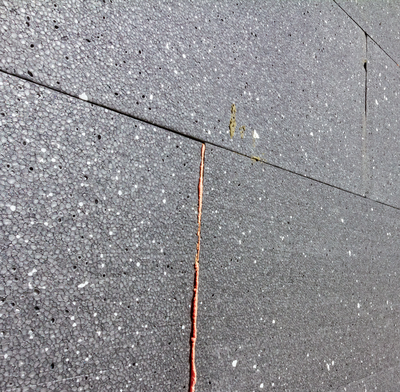
The primary cause of high heating costs is often leaks and building designs that allow heat to escape easily. Thermal insulation is the solution. Walls require additional insulation, typically using a layer of polystyrene, as external insulation is more effective. Proper thermal insulation can generate substantial savings.

Modern, energy-efficient homes not only save energy but also protect the environment. Reduced energy demand means less consumption of solid fuels and gas, leading to fewer emissions being released into the atmosphere.

Insulating the Roof to Save Energy

A poorly insulated roof is another major source of heat loss. Up to 40% of the heat escaping from a building can be lost through the roof. Mineral wool is an excellent solution for this issue. Choosing high-quality mineral wool is a worthwhile investment that pays off in just a few seasons. Mineral wool has impressive properties:

  • Hygroscopicity: It does not absorb moisture, maintaining its excellent insulating parameters.
  • Vapor permeability: Prevents the growth of microorganisms, fungi, and mold.
  • Acoustic insulation: Effectively dampens noise from outside.

Ask about such mineral wool at ANT BM Limited branches in London and Manchester.

Additionally, insulating an attic with mineral wool is relatively straightforward and can often be done without hiring professionals. Particularly for unused attics, the work can easily be completed independently.

Floor Insulation for Lower Bills

Energy savings also involve insulating floors, which is just as important as insulating walls or attics. Properly insulated floors offer everyday comfort—warmer and more pleasant surfaces—and reduced heating bills over time. Floor insulation is beneficial for both new and older buildings.

A well-executed floor insulation process includes multiple layers:

  1. A sublayer (a mix of gravel and sand).
  2. A concrete screed (light, base-level concrete).
  3. Thermal insulation (a thick polyethylene sheet, followed by polystyrene or extruded polystyrene).
  4. Another layer of polyethylene and a screed base before laying the final flooring.

Floor insulation on ground-level buildings is relatively simple, but it requires following specific steps to achieve a satisfactory outcome.

Insulating Foundations

Properly insulating foundations is crucial for a building’s functionality. Thermal insulation prevents heat from escaping into the ground. Before starting foundation insulation work, ensure careful waterproofing, both horizontally and vertically, to protect against moisture, which could compromise the insulation’s effectiveness.

Expanded polystyrene (EPS) is commonly used for foundation insulation. However, it is not suitable in areas with high groundwater levels. In such cases, extruded polystyrene (XPS), also known as styrodur, is a better option despite being more expensive. It is highly resistant to moisture and maintains its properties even with prolonged water contact.

Insulating materials are mounted to the foundations with polyurethane adhesive, which provides a stable bond within minutes. The insulated foundation walls should also be covered with a dimpled membrane (or thick construction foil) and backfilled with soil.

Modern Windows and Doors

Old, leaky windows and exterior doors contribute significantly to energy loss. Replacing them with energy-efficient models and ensuring proper installation is an effective solution. For example:

  • Triple-pane windows provide excellent thermal and acoustic insulation. Their low heat transfer coefficient reduces energy consumption during the heating season.
  • Light transmittance coefficient should be 70% for energy-efficient homes, while the total solar energy transmittance coefficient should be 50-60%.

Investing in high-quality entrance doors with an insulating layer (commonly polyurethane foam or polystyrene) is another step toward minimizing heat loss. Properly sealing the threshold is also critical to prevent water accumulation at the bottom of the door frame.

High-quality doors typically have a thermal transfer coefficient below 1.7 W/(m²K), while passive house models boast coefficients as low as 0.71-0.73 W/(m²K). These parameters should be certified.

If replacing windows and doors is too costly, consider installing new seals. Aging seals often significantly reduce thermal performance. Many seal options are available, including rubber and foam varieties.

Conclusion

The above methods of energy savings significantly reduce a building’s heat energy requirements. Combined with responsible purchasing and use of household appliances and lighting, they can substantially lower monthly bills.

(0)

The facade is the calling card of any building, but its appearance and aesthetics are not the only considerations. It’s worth selecting a plaster whose properties will best protect the walls of your home. The type of plaster you choose plays a crucial role. While acrylic and silicone plasters share many common features, their differences determine the conditions under which they should be used. So, which plaster should you choose to fulfill its purpose?

What to Consider When Choosing Plaster

Each plaster type has specific properties that, depending on the building, its location, and the materials previously used, can be an advantage or a disadvantage. Understanding these properties is essential to make the right decision, as the plaster you choose will significantly affect the building’s maintenance over time. It’s also critical to adhere to the application conditions recommended by the manufacturer.

Differences Between Acrylic and Silicone Plaster

Vapor Permeability

This property, also known as diffusion resistance, varies between the two types of plaster. Acrylic plaster forms a barrier to water vapor, meaning it cannot be applied to fresh or damp walls. Additionally, combining acrylic plaster with mineral wool insulation is a poor choice, as this combination can lead to wall dampness and detachment of the facade’s outer layer.

In contrast, silicone plaster is highly vapor-permeable and suitable for insulation using both mineral wool and polystyrene. Its microporous structure facilitates the transport of water vapor and gases, making it a “breathable” plaster.

Resistance to Damage and Dirt

Acrylic plaster is highly resistant to mechanical damage. Its elasticity makes it ideal for buildings near busy roads, where vibrations often cause cracks. It is also frequently used for schools or buildings near areas where children play sports.

Both types of plaster contain specific polymer blends that reduce the adhesion of dust and dirt. However, silicone plaster has a self-cleaning ability. Its hydrophobic nature prevents dirt from sticking to the facade, allowing it to be washed away by rain or pressure washers.

Resistance to Mold and Algae

Both types of plaster contain encapsulated biocides, which protect them from microbial contamination. However, silicone plaster is far more resistant to algae growth than acrylic plaster. After several years, the latter may develop discoloration in shades of green, blue, or black.

Application Recommendations

Both types of plaster can be used for new buildings and renovations of older ones, but their applications differ slightly. Acrylic plaster is best suited for buildings in areas with low or moderate pollution, such as suburban areas. It should not be used for renovating walls with existing moisture due to its low vapor-permeability properties.

Conclusion

Acrylic and silicone plasters both have their pros and cons. They are popular choices for finishing building facades and are available as ready-to-use mixtures in a wide range of colors. However, silicone plaster offers long-lasting aesthetics for facades, maintaining a high-quality appearance over the years.

(0)

Walls with unique special effects are a reliable way to create original interiors. The wide range of such products available on the market allows for achieving distinctive and unconventional decorative effects. Are you thinking about such a unique decoration? Consider the Velur Effect by Fox Dekorator.

Velur Effect – Ceramic Decorative Plaster and Its Features

The Velur Effect by Fox Dekorator brings elegance and a modern character to your interiors. Proper lighting enhances the shimmering effect of the surface beautifully.

The Velur Effect is a resin-based plaster designed for indoor use and comes ready to apply. It is easy to work with, as it is applied with a trowel. Additionally, it does not require extra sealing and perfectly hides micro-cracks and surface irregularities. This makes it an excellent choice for creating stunning effects on walls or ceilings, whether in modern or classic styles.

This specialist plaster is based on an acrylic dispersion with fine aggregates, ensuring high hardness and durability. It also has enhanced resistance to stains and increased washability.

The Velur Effect by Fox Dekorator is ready to use, but before starting, the product should be thoroughly mixed, either manually or with a low-speed mixer.

It is worth noting that while the product is available in pre-defined colors, one of the plasters—Velur Alaska—can be tinted using Fox Dekorator pigments for customized shades.

Velur Effect by Fox Dekorator – Application Instructions

Before starting, it is advisable to plan the sequence and method of applying the layers and test the final effect on a small sample!

The plaster should be applied in two layers with a stainless steel trowel to the thickness of the grain, followed by smoothing. After applying the first layer, allow 3-6 hours for the surface to dry. The second layer should also be applied to the thickness of the grain, forming the desired pattern and gently smoothing the surface. Finally, leave the surface to dry completely.

For a durable finish, the substrate must be properly prepared in advance. It should be sufficiently load-bearing, stable, and seasoned to an air-dry state. Under normal conditions (approximately 20°C and 55% humidity; drying time may extend under different conditions), the following minimum drying times apply:

  • Gypsum, cement, and cement-lime plasters: 1 week per centimeter of thickness.
  • Concrete walls and ceilings: at least 28 days.

Additionally, any defects and cracks should be repaired, and the surface should be thoroughly cleaned of dust, dirt, lime, oils, grease, paint residues, etc., before applying the decorative plaster. Then, a bonding primer should be used. Failing to clean the walls may weaken the plaster’s adhesion.

(0)